
You may find yourself needing to deploy multiple NGINX Ingress Controllers to serve each namespace on your Kubernetes cluster. This may be useful in a scenario where you have multiple client deployments on the same K8S cluster; and you want to assign a public load balancer IP address for each client to achieve logical separation. This blogpost explores how to do that.
We shall be using the Azure Kubernetes Service (AKS) environment to demonstrate the solution, although these commands should work across the major cloud providers. For the NGINX Ingress controller’s deployment, we shall use Helm 3: The package manager for Kubernetes. Note that we shall be using the NGINX community version (ingress-nginx) which is maintained by the Kubernetes community, and not the NGINX version (nginx-stable) which is maintained by F5 NGINX. You can only use helm3 for the community version deployment, and Kubernetes >= 1.19 is also required.
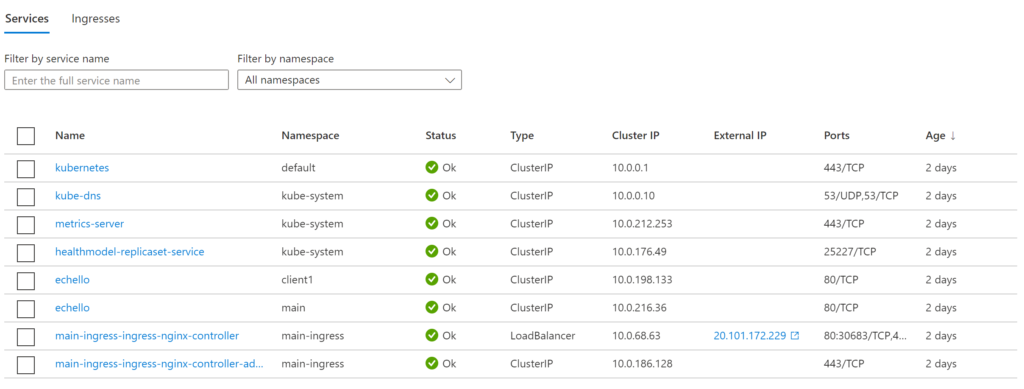
Currently on my cluster are two deployments called “echello” in two different namespaces: main and client1. There is a main ingress controller in the “main-ingress” namespace with an external public IP already assigned.
I now want to deploy another ingress controller to serve the resources of client1 in the client1 namespace. The following basic deployment creates the new ingress controller for client1:
RELEASE_NAME=client1-ingress

helm repo add ingress-nginx https://kubernetes.github.io/ingress-nginx
helm repo update

helm install $RELEASE_NAME ingress-nginx/ingress-nginx  \
  --namespace $RELEASE_NAME --create-namespace \
  --set controller.ingressClassByName=true \
  --set controller.ingressClassResource.name=$RELEASE_NAME \
  --set controller.ingressClassResource.controllerValue="k8s.io/$RELEASE_NAME" \
  --set controller.ingressClassResource.enabled=true \
  --set controller.replicaCount=2
The above deployment takes about three minutes to run. In the meantime, let’s explore each block of the above command:
- Give the deployment unique RELEASE_NAME.
- Add the correct chart repository, then update information of available charts locally.
- Install the ingress-nginx chart and give it a unique RELEASE_NAME (i.e. client1-ingress)
- Set the deployment in its own client-specific namespace for ingress controllers, and create the K8S namespace if it doesn’t exist.
- Set the controller to process IngressClass per name to true. The default is “false”.
- Set the name of the ingressClass. The default is “nginx”, but because this has to be unique per-controller, we set it as our $RELEASE_NAME here.
- Set the controller-value of the controller that is processing this ingressClass. The default is “k8s.io/ingress-nginx”, but this ought to be unique per-deployment so we use $RELEASE_NAME.
- Enable this ingressClass. The default is “true”, but let’s set it just to be sure.
- Set the controller pods to 2. The default is 1, but it is advisable to run at least two ingress controllers for higher availability.
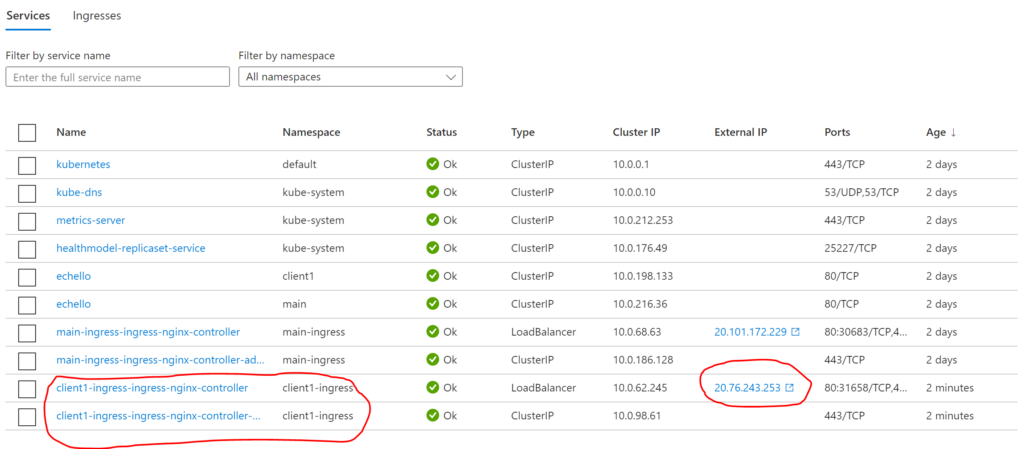
When you run the above, you get a shiny new ingress controller in the client1-ingress namespace ready to serve clients:
To deploy a third ingress controller to serve another namespace (e.g. client2), simply modify the $RELEASE_NAME variable, and then run the helm install command again.
Now let’s proceed to look at how the ingress route file will look like. Remember to apply this in the appropriate client’s namespace (e.g. client1) so that it can “see” the chosen service:
apiVersion: networking.k8s.io/v1
kind: Ingress
metadata:
  name: client1-ingress
  annotations:
    nginx.ingress.kubernetes.io/ssl-redirect: "false"
    nginx.ingress.kubernetes.io/use-regex: "true"
spec:
  ingressClassName: client1-ingress
  rules:
  - host: client1.domain.co
    http:
      paths:
      - pathType: Prefix
        path: /
        backend:
          service:
            name: echello
            port:
              number: 80
The key thing to note from the above is the spec of ingressClassName is set to our RELEASE_NAME (i.e. client1-ingress). This is a newer way of doing things as opposed to using the “kubernetes.io/ingress.class: client1-ingress” annotation in the past.
When you apply the file, you will now notice two Ingresses on the Azure portal; each pointing a different domain to a different IP address.
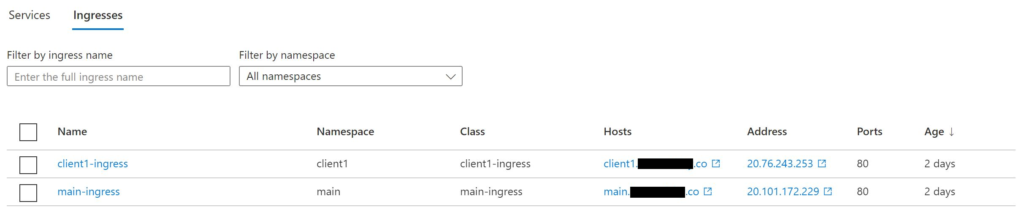
Finally, set the DNS A-record to point to the new IP, and you should be good to go!
Note: If you make a mistake with a setting on the helm chart, you may end up with a scenario where you have two different ingress controllers deployed on two different public IP addresses, but both the Ingresses on the same public IP as shown below:
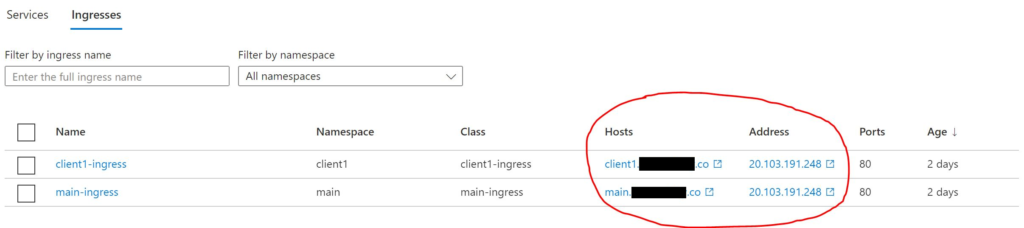
This does not achieve the desired logical separation. To fix this, run:
helm uninstall $RELEASE_NAME --namespace=$RELEASE_NAMEAfterwards, re-install the ingress controller with all the correct parameters as specified above.
This concludes this tutorial on running multiple NGINX Ingress Controllers, one for each Kubernetes Namespace. While there are other settings you can include, this basic setup should get you started. I’ve since released the IP addresses associated with this tutorial back to Azure.
I spent a lot longer than I should’ve setting this up given all the variations and changes, so I wrote this blogpost to save you from suffering as I did.
All the best with your deployments!
References:
- https://kubernetes.github.io/ingress-nginx/
- https://github.com/kubernetes/ingress-nginx/tree/main/charts/ingress-nginx