
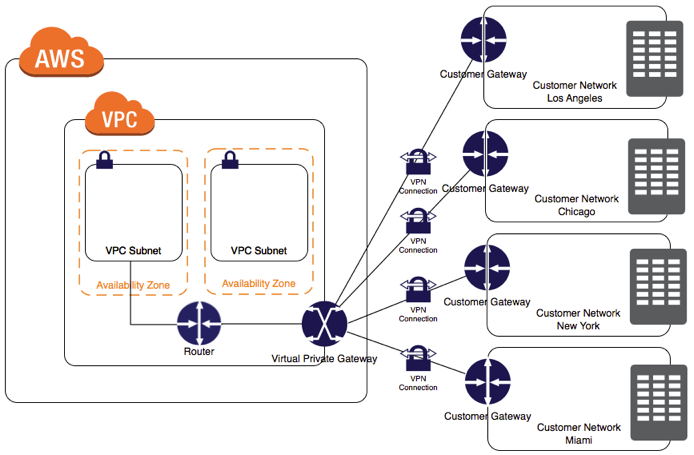
This blogpost will cover how to connect a standalone Virtual Private Server (VPS) running Linux (specifically Debian) to AWS’ Virtual Private Cloud (VPC) using a site-to-site VPN with Static Routing.
This blogpost is relevant for those who find themselves having to integrate their AWS infrastructure with external sites where they do not own, or do not have permission to configure the gateway device (e.g. a Cisco ASA appliance).
In a previous blogpost, I broke down how to do this with dynamic routing (BGP). In this blogpost, we’ll explore the same with static routing which is even easier.
This blogpost assumes you have an AWS VPC with public and private subnets (NAT) which comes with the following elements in place:
- A VPC with a size /16 IPv4 CIDR block (10.0.0.0/16).
- A public subnet with a size /24 IPv4 CIDR block (10.0.0.0/24).
- A private subnet with a size /24 IPv4 CIDR block (10.0.1.0/24).
- Two instances with private IPv4 addresses in the public and private subnets (10.0.0.10 and 10.0.1.10 respectively). The public instance also has a public IP.
- A custom route table associated with the public subnet. This route table contains an entry that enables instances in the subnet to communicate with other instances in the VPC over IPv4.
- The main route table associated with the private subnet. The route table contains an entry that enables instances in the subnet to communicate with other instances in the VPC over IPv4.
- A instance / Virtual Private Server (VPS) in a different VPC (or even a different cloud provider) with a private IP range that doesn’t clash with 10.0.0.0/16. You should opt for an “Elastic”/Fixed Public IP address so that the gateway IP doesn’t change often.
With those elements in place, let’s proceed to create a new customer gateway for our integration. A customer gateway is a resource that you create in AWS that represents the customer gateway device in your on-premises network. When you create a customer gateway, you provide information about your device to AWS.
Click the “Customer Gateways” link under the “Virtual Private Network” tab of the VPC Console then click “Create Customer Gateway”.
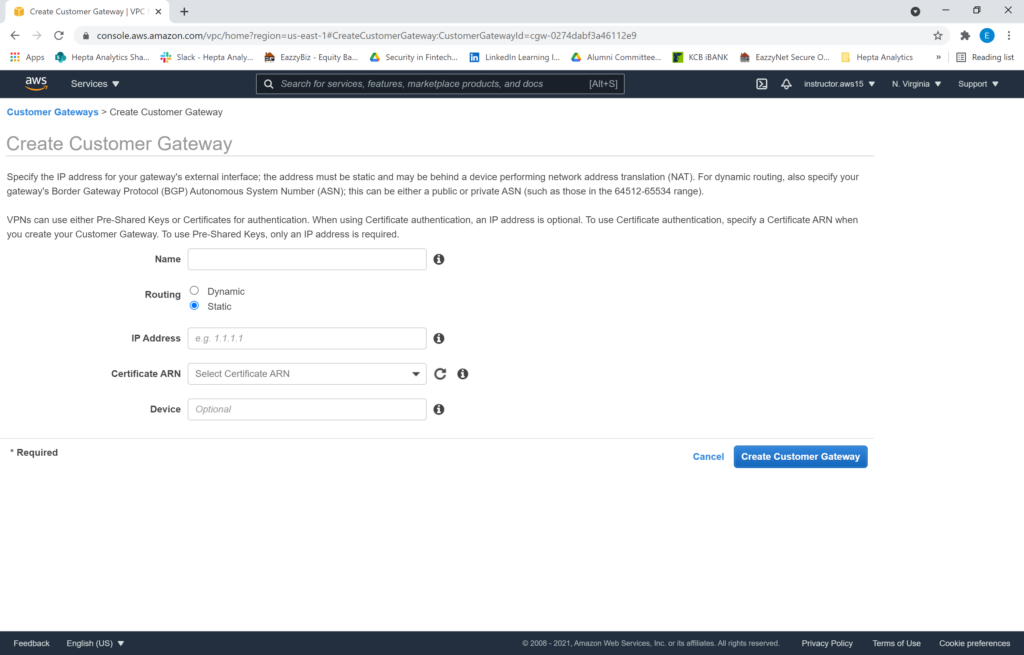
Name the customer gateway appropriately (e.g. MyVPS_CG). Set the routing as static. Specify the IP address of the device (this is the public IP address of your VPS). Accept the rest of the defaults, then “Create Customer Gateway”. The operation takes about one minute.
Now we can create a Virtual Private Network (VPN) between the two sites for secure communication over private addressing. Click “Site-to-site VPNs” under the “Virtual Private Network” tab on the left pane then click “Create VPN Connection”.
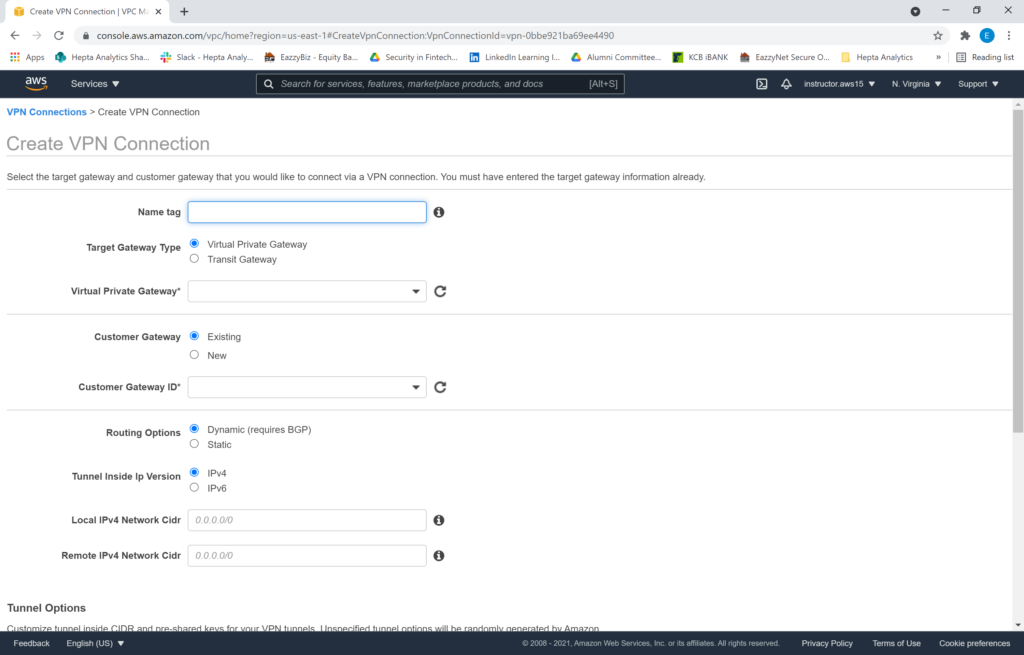
Name the VPN appropriately (e.g. MyVPS_VPN), select your VPG, select your existing Customer Gateway, and set the routing as static. Then enter the internal IP prefixes that you will be communicating with on your secondary site (e.g. 172.31.93.1/32). Keep this range as small as is necessary for security purposes. You may set other options such as PSKs, but we’ll go with the defaults. Then click “Create VPN Connection”. The deployment will take about 5 minutes, and it will create two tunnels for you. One primary, and one secondary, both connecting to the same infrastructure.
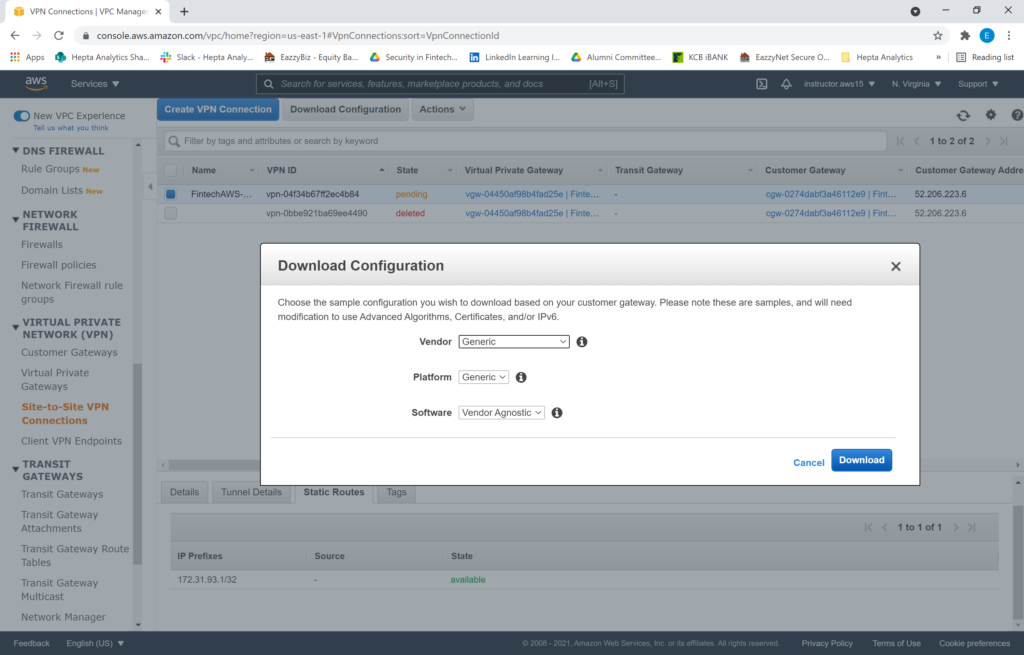
Once the deployment is done, we can now download the configuration file which we will use to configure the VPN between our local site, and AWS. Click “Download Configuration”. We’ll go with the generic vendor, a generic platform, and a vendor agnostic software option.
Here are the configs you need to take note of when the download is complete. Copy these configurations into your text editor and replace the addresses according to your download file:
Tunnel 1
- Pre-Shared Key : AAAA
Outside IP Addresses:
 - Customer Gateway : 1.1.1.1
 - Virtual Private Gateway : 2.2.2.2
Inside IP Addresses
 - Customer Gateway : your.vps.private.ip/32
 - Virtual Private Gateway : 10.0.0.0/16

Tunnel 2
- Pre-Shared Key : BBBB
Outside IP Addresses:
 - Customer Gateway : 1.1.1.1
 - Virtual Private Gateway : 3.3.3.3
Inside IP Addresses
 - Customer Gateway : your.vps.private.ip/32
 - Virtual Private Gateway : 10.0.0.0/16
The Host Setup
Next, log on to your Linux VPS Instance (i.e. the customer gateway) as root and begin by installing a few packages:
apt-get update
apt-get install ipsec-tools racoon
Next, we shall edit /etc/racoon/psk.txt and add our secret/pre-shared key to the file.
2.2.2.2 AAAA
3.3.3.3 BBBB
Next we shall modify /etc/racoon/racoon.conf as below. These configs match the current default AWS configurations for a site to site VPN. Make sure to indent the configurations properly:
log notify;
path pre_shared_key "/etc/racoon/psk.txt";
path certificate "/etc/racoon/certs";
remote 2.2.2.2 {
 exchange_mode main;
 lifetime time 28800 seconds;
 proposal {
 encryption_algorithm aes128;
 hash_algorithm sha1;
 authentication_method pre_shared_key;
 dh_group 2;
 }
 generate_policy off;
}

remote 3.3.3.3 {
 exchange_mode main;
 lifetime time 28800 seconds;
 proposal {
 encryption_algorithm aes128;
 hash_algorithm sha1;
 authentication_method pre_shared_key;
 dh_group 2;
 }
 generate_policy off;
}

sainfo address your.vps.private.ip/32 any address 10.0.0.0/16 any {
 pfs_group 2;
 lifetime time 3600 seconds;
 encryption_algorithm aes128;
 authentication_algorithm hmac_sha1;
 compression_algorithm deflate;
}
The next step is to edit /etc/ipsec-tools.conf as follows:
flush;
spdflush;

spdadd your.vps.private.ip/32 10.0.0.0/16 any -P out ipsec
esp/tunnel/your.vps.private.ip-2.2.2.2/require;
spdadd 10.0.0.0/16 your.vps.private.ip/32 any -P in ipsec
esp/tunnel/2.2.2.2-1.1.1.1/require;

spdadd your.vps.private.ip/32 10.0.0.0/16 any -P out ipsec
esp/tunnel/your.vps.private.ip-3.3.3.3/require;
spdadd 10.0.0.0/16 your.vps.private.ip/32 any -P in ipsec
esp/tunnel/3.3.3.3-1.1.1.1/require;
Finally, we can degub racoon by running it in the foreground and checking for syntax errors.
racoon -d -v -F -f /etc/racoon/racoon.conf
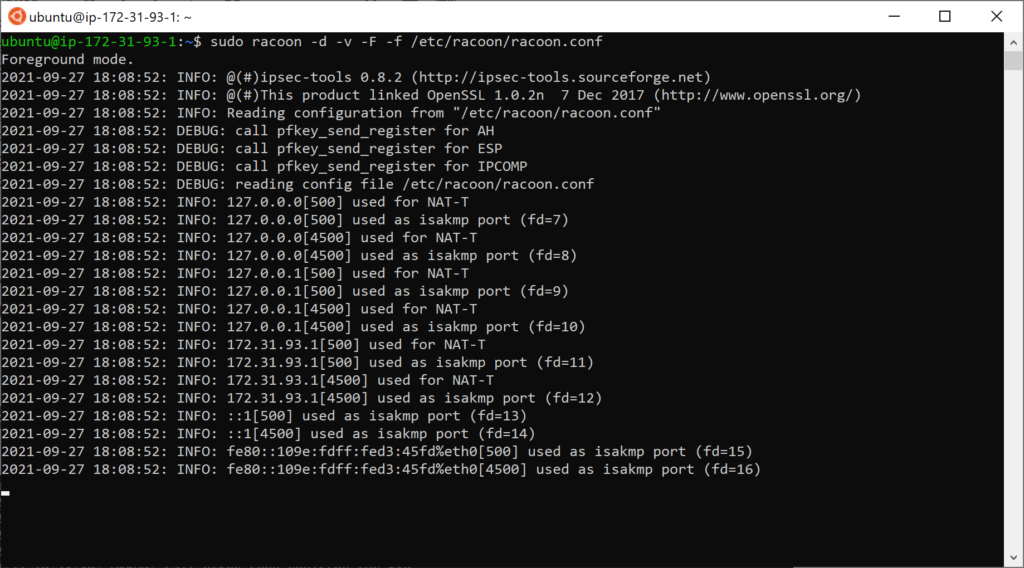
If the output looks like above, it means it’s good to go. If not, refer to the error messages for potential errors such as syntax errors in one of the configuration files.
Finally restart setkey and racoon using these commands:
/etc/init.d/setkey restart
/etc/init.d/racoon restart
You may opt to start the two services on startup to make the VPN persistent after a reboot:
sudo update-rc.d setkey enable
sudo update-rc.d racoon enable
Now we need to simulate “interesting traffic” to bring the tunnel up. Let’s set up a ping to the private IP of a resource on the AWS Side. Make sure ICMP traffic is allowed through the security group of the Private Instance on the AWS side. You may opt to set this up as a per-minute crontab in order to keep the tunnel alive even when no traffic is passing through it.
* * * * * ping 10.0.1.10
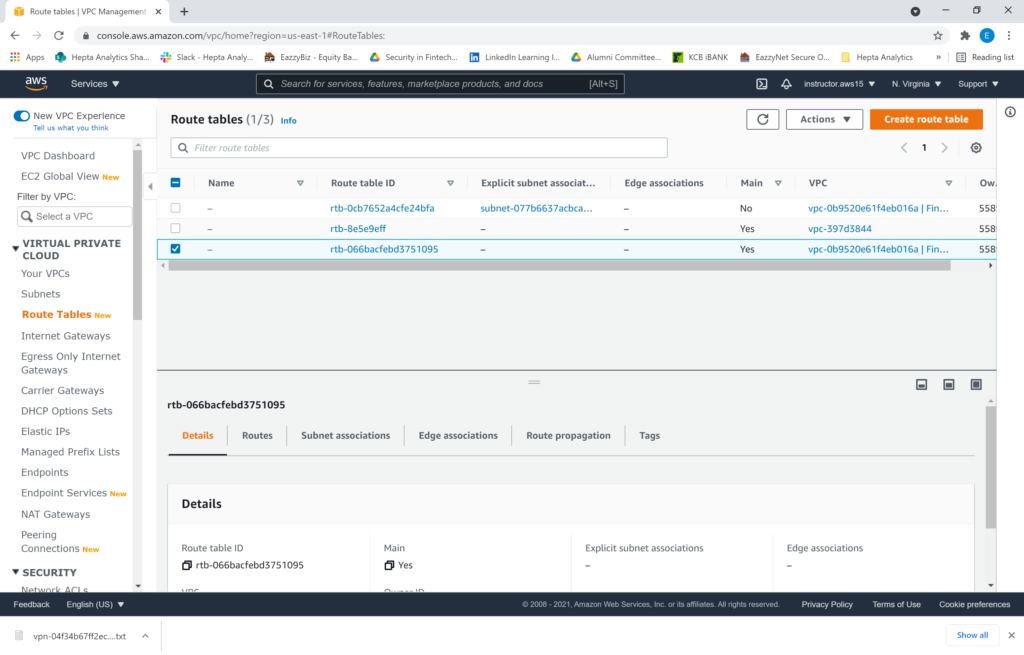
In the meantime, we also need to edit our route tables on the VPC to allow traffic from our external host to go through the Virtual Private Gateway. We need to edit the route tables to enable traffic into the private subnet. Click “Route Tables” under the “Virtual Private Cloud” tab. Select the “Main” route table (which happens to be the one that controls the routes for the private subnet).
Click on the “Routes” tab, then click “Edit routes”.

Then click “Add route” and enter the internal IP CIDR of your target server(s) on the partner side (E.g. 172.31.93.1/32). Keep this block as small as possible. Select the target as “Virtual Private Gateway” then select your VPG. Save the changes.
If you want to be able to enable communication between your VPS and your public resources, repeat the same process for the route table associated with the public subnet.
In a few moments, traffic from the ping you set earlier will start to flow, and your tunnel status will change to “Up”!
To add another partner, follow the same process of adding a customer gateway, creating the VPN, performing the configuration on the VPS, and editing the route tables accordingly.
This concludes this tutorial on securely connecting a standalone Virtual Private Server (VPS) running Linux (specifically Debian) to AWS’ Virtual Private Cloud (VPC) using a site-to-site VPN with Static Routing.