
In my previous blog I wrote about continuous delivery with Jenkins where I discussed what DevOps is and the various stages involved. I also went through the process of installing Jenkins on an Ubuntu server. Today I will be describing step by step the process of creating a pipeline in Jenkins to implement continuous delivery for Docker and Kubernetes
PREREQUISITE
- Setup Jenkins as described in my previous blog post
- Setup Kubernetes cluster. [Here](http://www.bensonmurimi.com/diary/read/9/how-to-setup-kubernetes-cluster-on-aws-using-kops-full-guide) is a full guide on how to set up a K8 cluster on AWS.
- Understand basic Linux commands
- Understand basic Kubernetes commands
WHAT YOU WILL LEARN
- Creating a deployment pipeline in Jenkins
- Creating a Jenkinsfie
- Running your first build/deployment
- Best practices for DevOps in Jenkins
1. Creating a Jenkins Pipeline
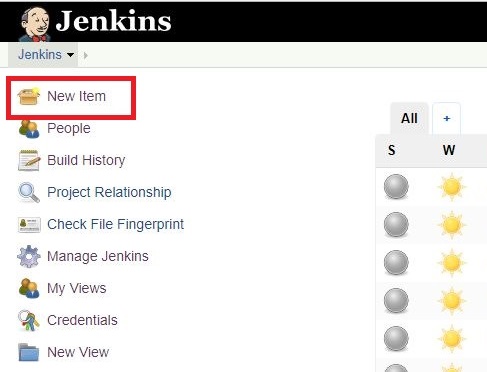
Login to Jenkins and navigate to Jenkins dashboard. Click on New item as shown in the figure below
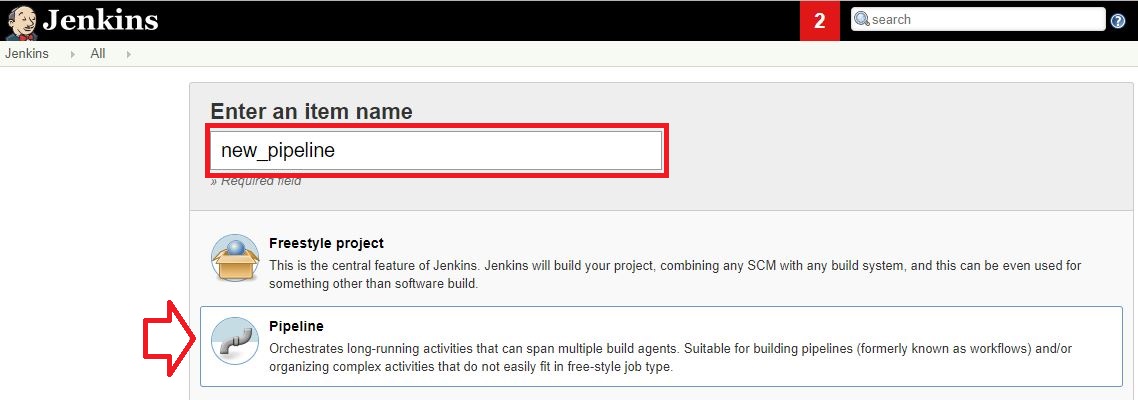
Select on pipeline and enter a new pipeline name
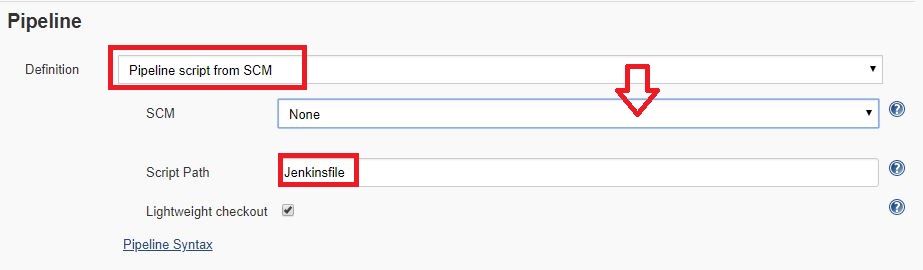
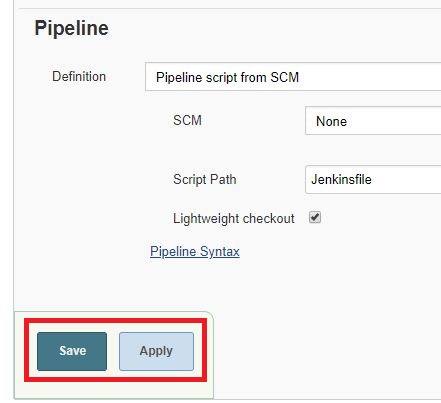
Change the pipeline definition to pipeline script from SCM. This file will include all the commands we want Jenkins to run.
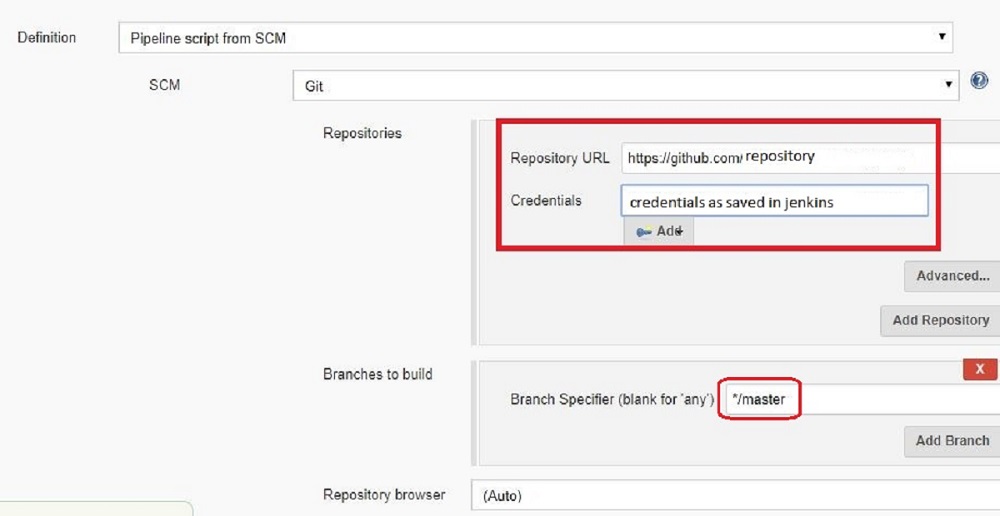
Configure the Source Control Management (SCM) as Git. Provide URL to the GitHub repository you want to use. Select the credentials that you configured before getting to this stage. Don’t forget to specify the GitHub branch you want to build from.
Save the pipeline and leave the script path to Jenkinsfile
2. Creating a Jenkinsfile
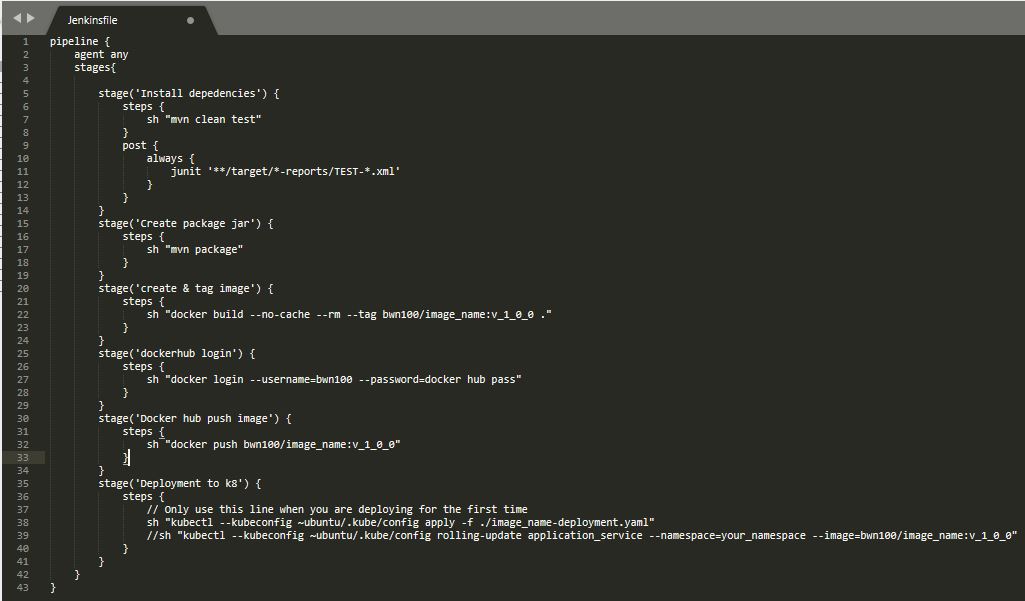
A Jenkinsfile contains all the commands you need to run in your deployment. This can be tweaked depending on the programming language you are using. In this blog I will use Java meaning that I will need to package the raw Java code into a Jar file before creating an Image.
Below is a sample Jenkinsfile for a pipeline. It’s defined in stages with each stage running one specific task. The stages are;
- Pull all the required dependencies for building a Java project
- MVN command to create a package jar
- Build and tag an image. Include –no-cache tag to prevent the build from caching the previous image. Notice the version v_0_0_1 which specifies the version of the image.
- Login to Docker Hub. Ideally you should have the username and password saved as environment variables.
- Push the image to Docker Hub
- Deployment to Kubernetes cluster. Not the two commands in that stage
Kubectl apply -f your_yaml_file Use this for the first time to create your deployment and a service
Kubectl rolling-update service_name --image Use this for updating the pods running your services.
In the next blog I will introduce you to creating Dockerfile and Yaml deployment files. All the best as you implement your DevOps tasks on Docker and Kubernetes.
One Reply to “Continuous Delivery Using Jenkins for Docker & Kubernetes [Part 2]”
Comments are closed.