
Last time I outlined steps of creating a kubernetes cluster and deploying a test image on AWS here.
Today lets talk about preparing your deployment yaml files by running one command. This can save you a lot of time creating and debugging your yaml file
Prerequisite
1. You have kubernetes cluster/ single kubernetes node running. You can set up kubernetes on your machine using minicube as explained in [this](https://rominirani.com/tutorial-getting-started-with-kubernetes-on-your-windows-laptop-with-minikube-3269b54a226) blog.
2. You have basic understanding of [docker](https://www.docker.com/) specifically creating an image and pushing it to docker hub. You can practice creating the yaml file with docker images in your machine but you wouldn’t be able to deploy them to the cloud.
Procedure
1. Run docker images to list all available images on your repository. In my case I have an image called bwn100/app:v2
2. Run kubectl run bwn100-app --image=bwn100/app:v2 -o yaml --dry-run > bwn100-app.yaml to create a boiler deployment file. A file named **bwn100-app.yaml** will be created in your working directory.
3. Open the file with vi if you are using Linux to view and edit the file vi bwn100-app.yaml
This is how your file should look like.
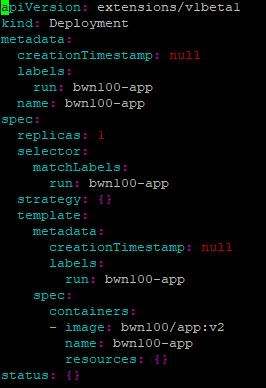
4. Edit the file to match your required settings and run kubectl create -f bwn100-app.yaml to deploy the image to kubernetes. You can now run kubectl get pods to list the deployed pods.
I hope this saves you sometime creating your deployment files.
Happy coding!